Solution: Déjà Vu
Answer: CONCORDIACUMMEMORIA
Written by The Enigmatologists
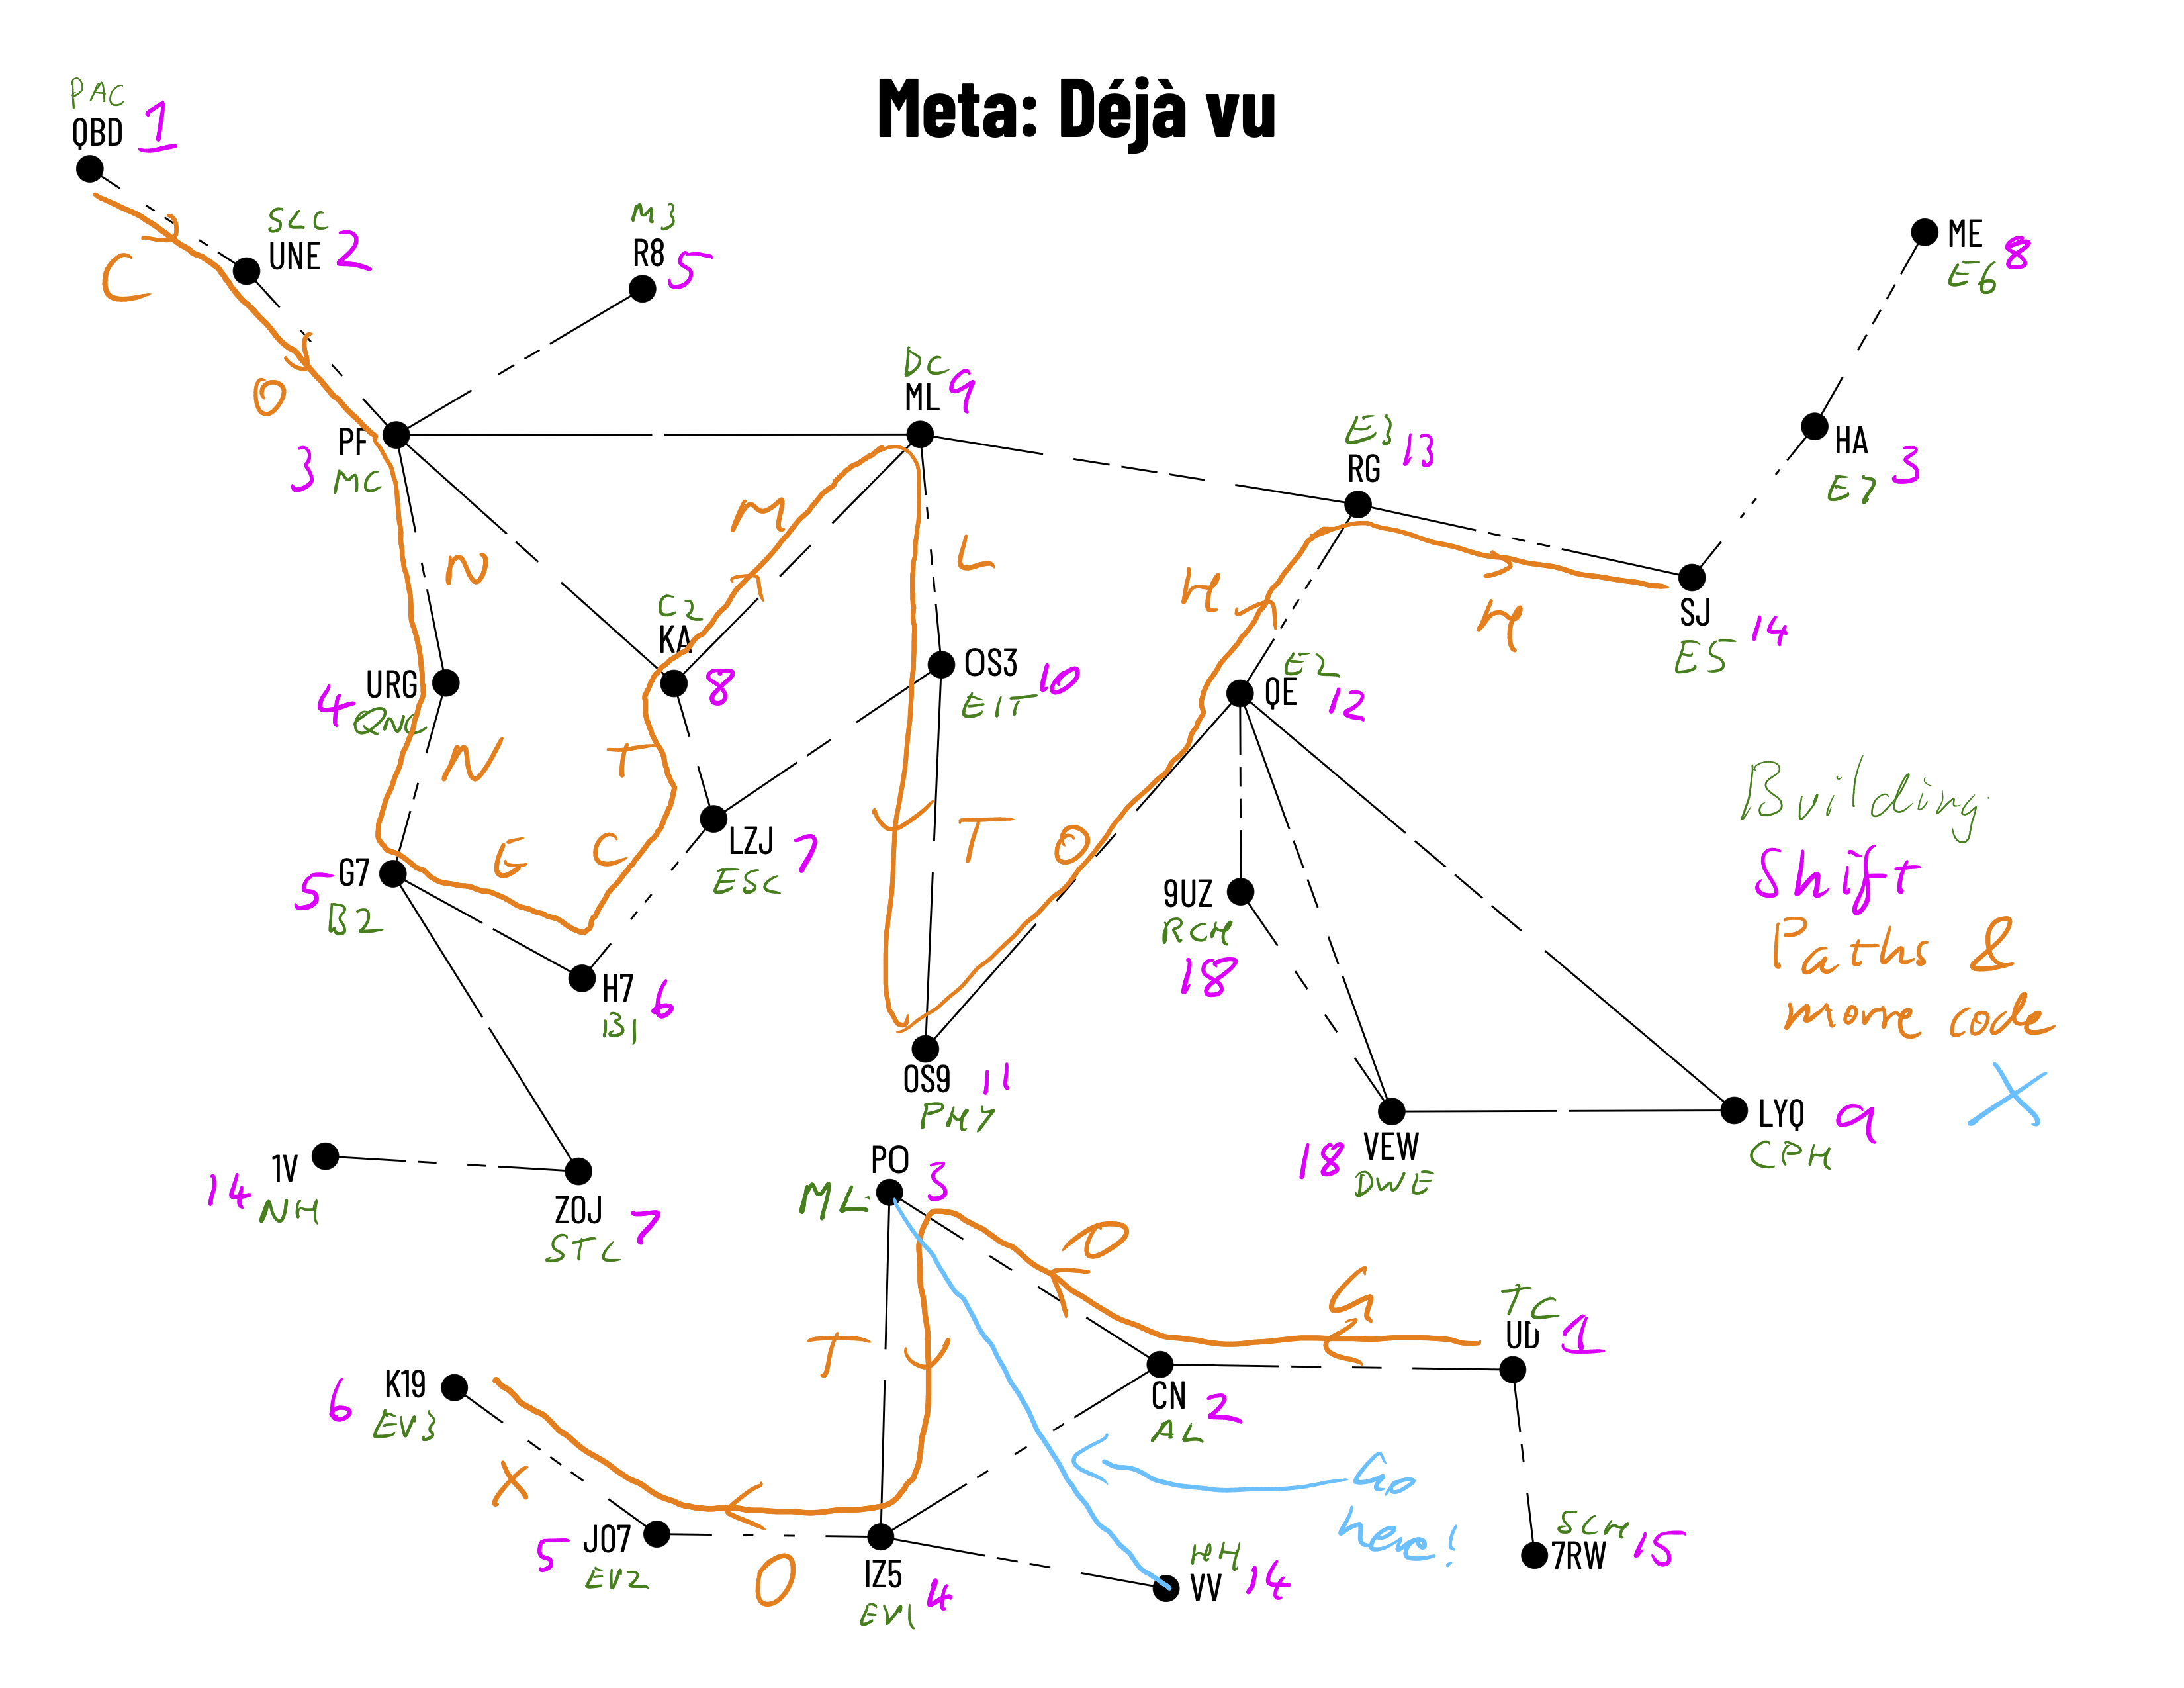
The graph is actually a map of the UW main campus, with each dot representing a building, and two buildings joined by an edge if they are connected by a tunnel or bridge.
The labels on the puzzle are the building names Caesar shifted by some amount.
The shifting occurs on the alphabet ABCDEFGHIJKLMNOPQRSTUVWXYZ0123456789.
So, for instance, shifting 8 and Z by two gives A and 1 respectively.
The image below has all the buildings and how much their abbreviations are shifted to get what appears in the puzzle.
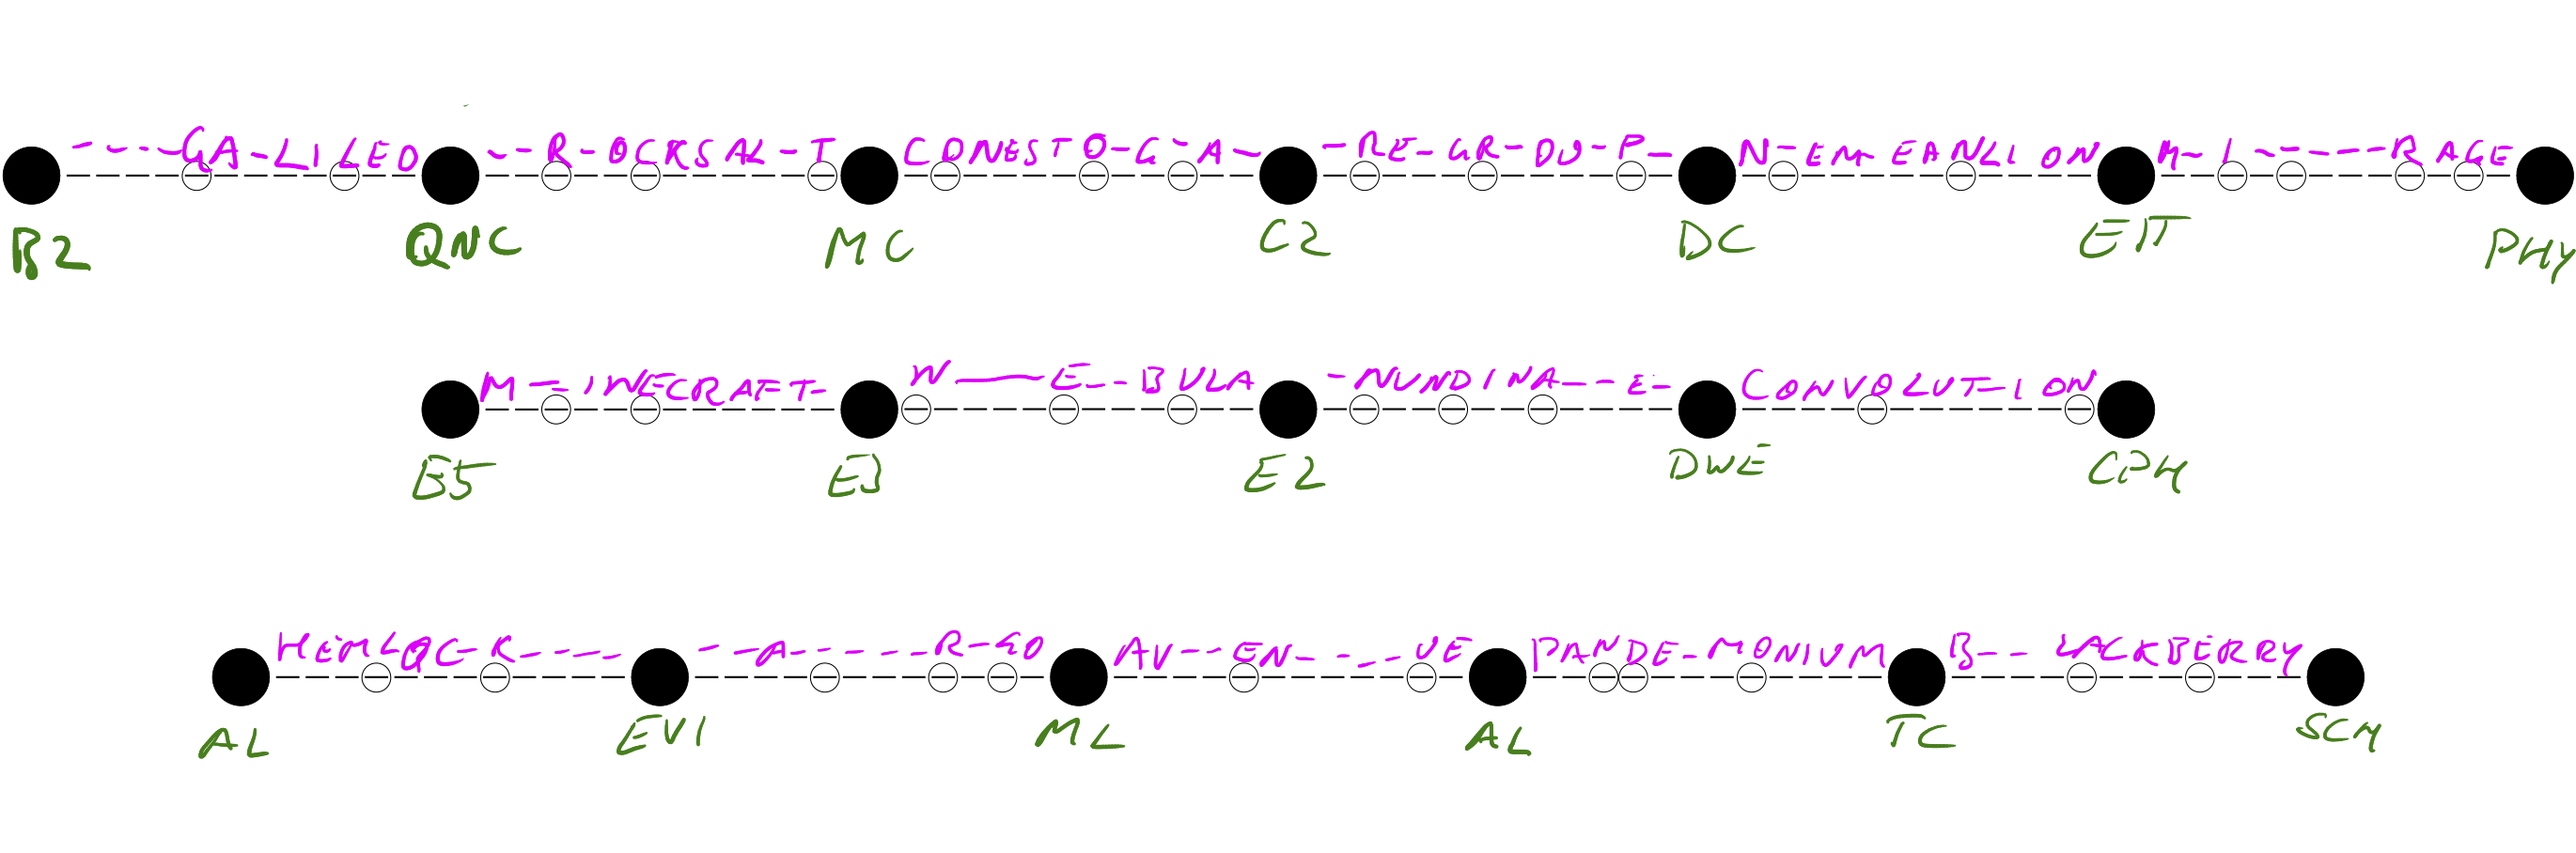
There are now two paths in the puzzle, one in the upper component of the map, and one in the lower component, that start at a building whose abbreviation has been shifted by one, and move through consecutively higher shifts.
These two paths are highlighted in the image below.
Following these paths and reading the morse code (in the white space) as you go yield the messages CONNECTMLTOHH and GOTOX.
Or, as these strings are more sensibly read, "Connect ML to HH", "go to X".
If you draw a straight line from ML to HH, it crosses the tunnel joining AL to EV1, so you go there!
Deja vu two
In the tunnel, you find a red envelope with a QR code, leading you to Deja vu two. At the end of the tunnel you are in, there is a mural consisting of 34 columns and 3 rows of pictures, all kind of the shade of green as the grid at the bottom of the puzzle. The silver columns are windows, and the brown rectangles are bulletin boards.
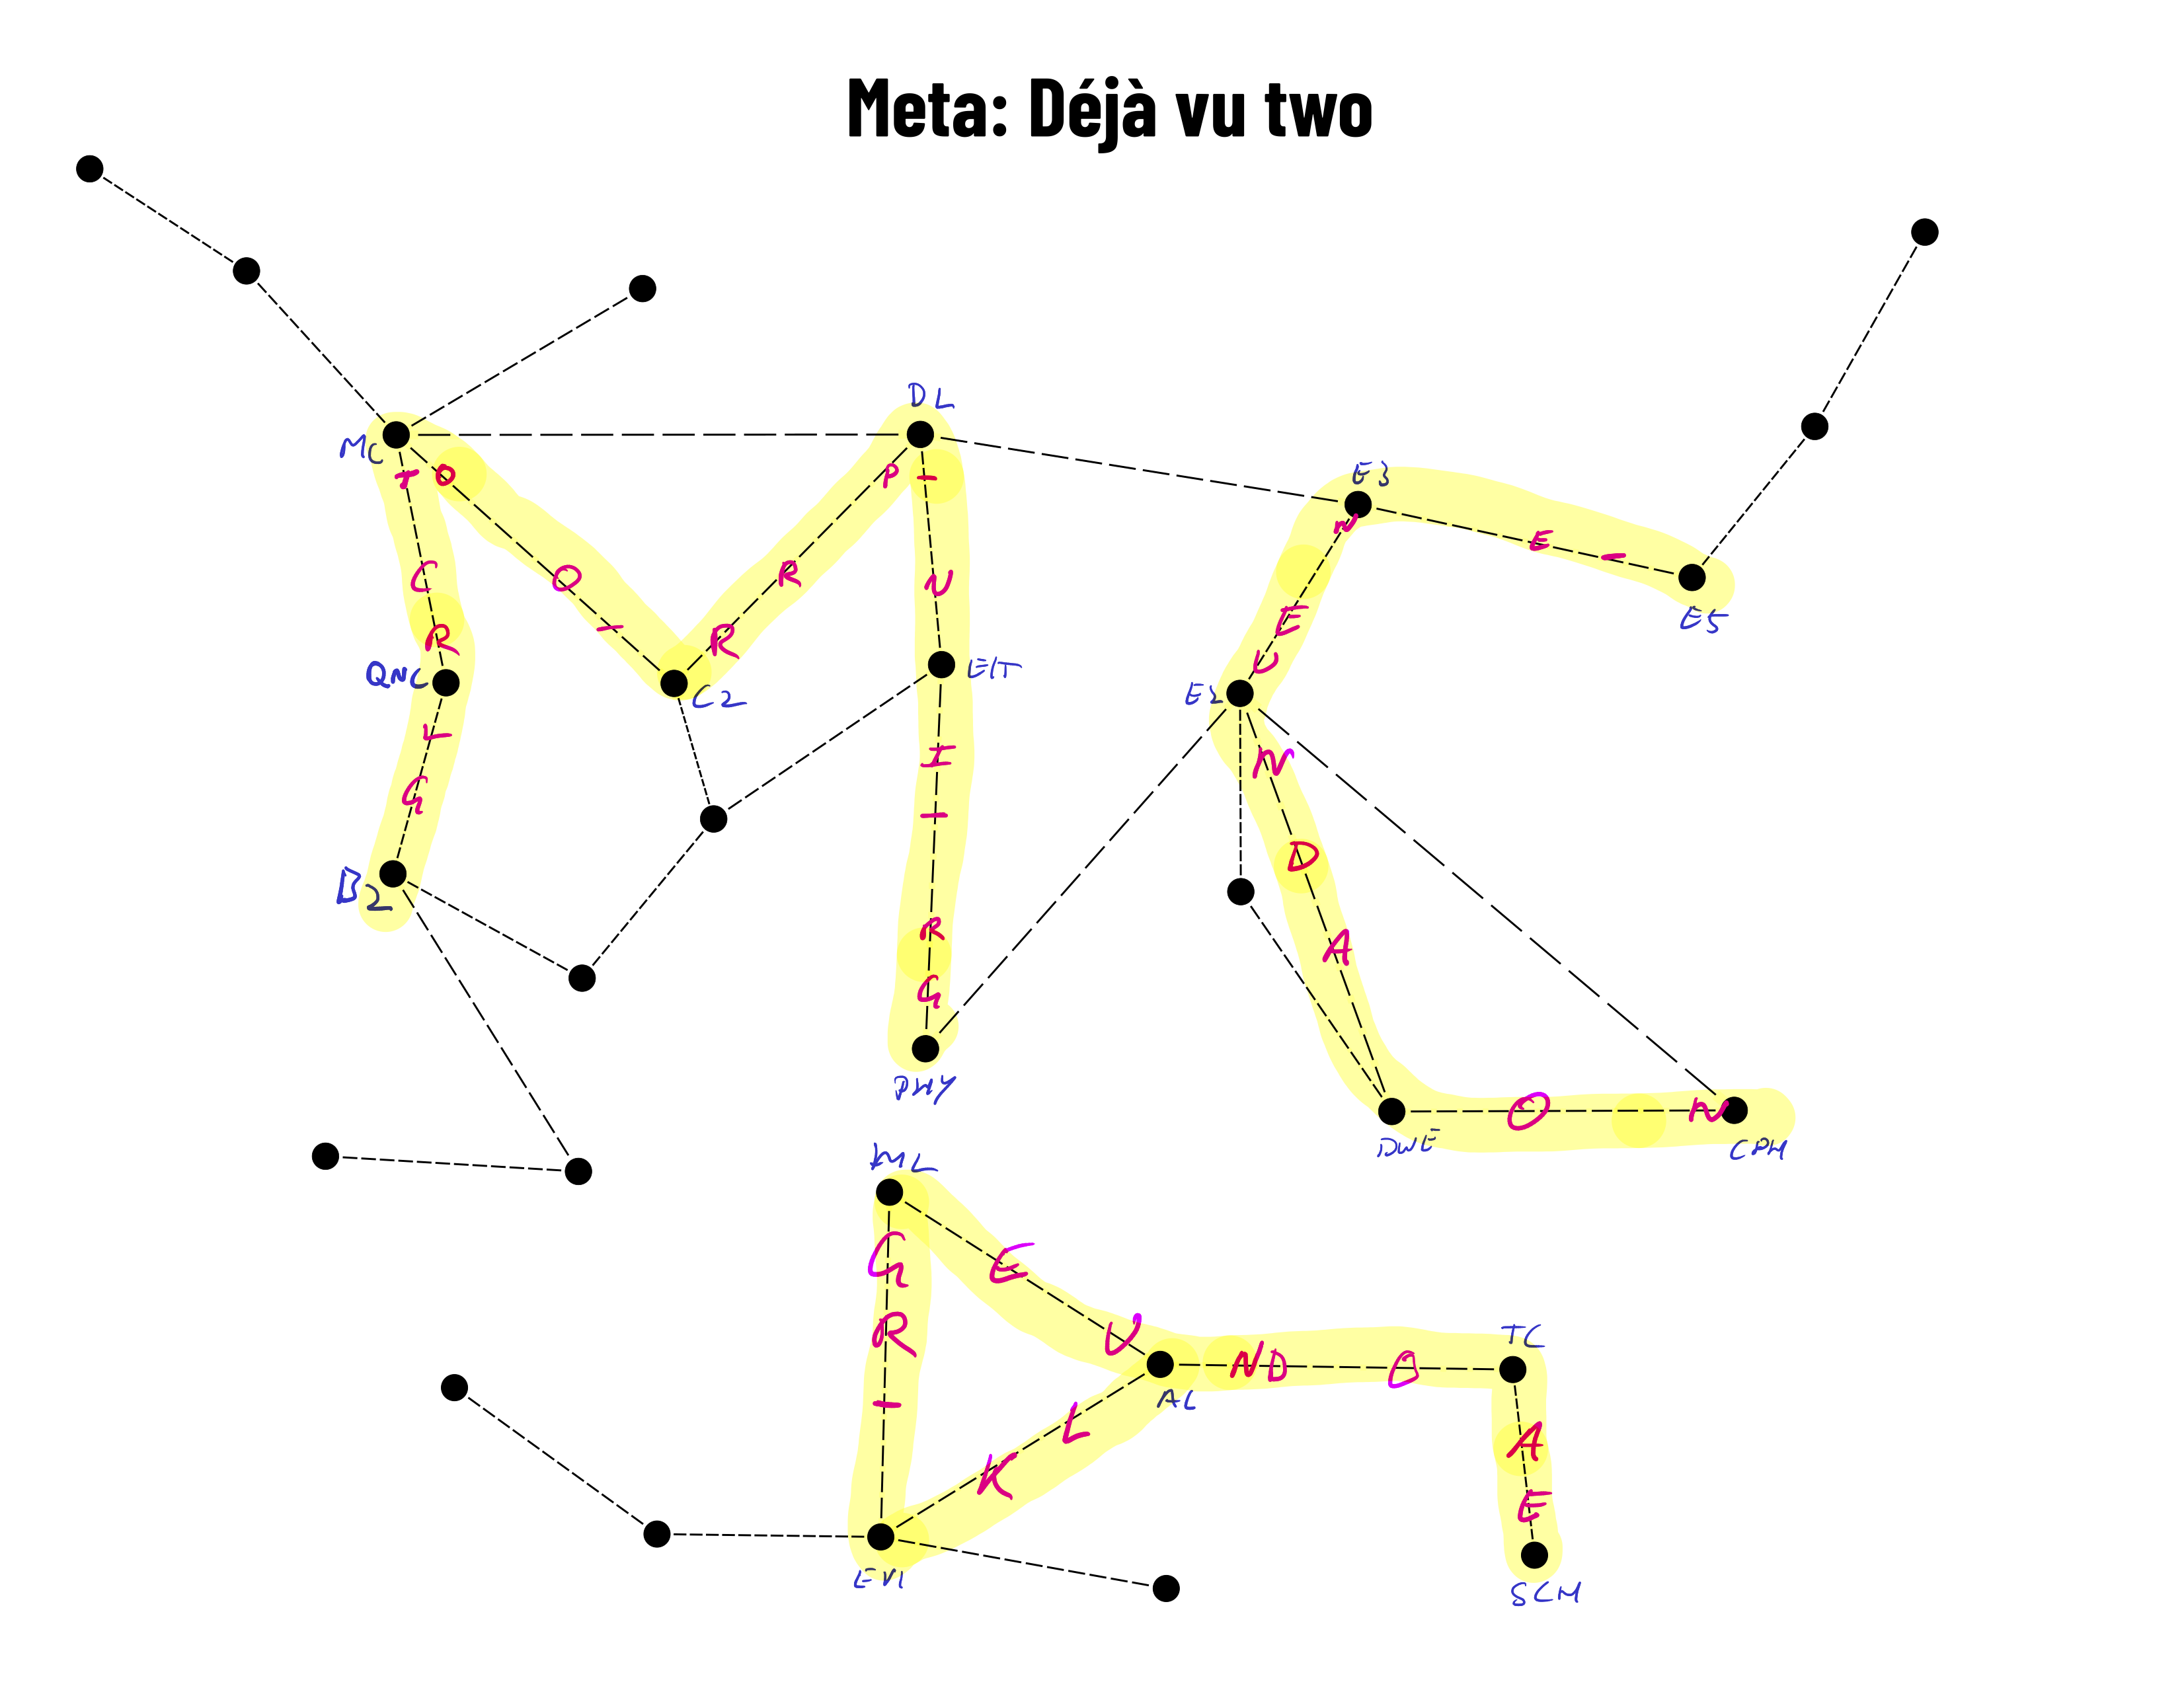
Each word describes one of the squares uniquely. The first row on page two is bark, boardwalk, cliffs, fox. You identify the positions of those four squares. Then you draw a line between the dots on the squares if there is a dashed edge between the corresponding words on page one. Referring still to the first row, there is a dashed edge joining boardwalk to each of the other three words in the row. There are no other dashed edges joining any other pairs of words in the row. Drawing the corresponding lines in the grid at the bottom of page two gives the first T. Repeating for the rest of the rows gives the image below, where the number beneath each letter is the row from which the letter was created.

The message reads EiT To RCh. As with Part 1, you draw a line between EIT and RCH, which intersects the edge joining PHY to E2. So your next stop is the bridge joining PHY to E2.
Deja vu too
Again, there is a red envelope with a QR code, taking you to Deja vu too. It is at this point we can finally use the answers and the information from the narratives.
Each narrative involved the protagonist moving from one building on campus to another. Once a puzzle was solved, a list of numbers appeared next to the answer on the puzzles page. In order of puzzle release, here is the information you were given, and the information you needed to extract from each narrative piece.
| Answer | Numbers | Buildings |
|---|---|---|
| GALILEO | (1,2,3,4,7) | B2 to QNC |
| ROCKSALT | (1,2,4,11) | QNC to MC |
| NEMEANLION | (2,5) | DC to EIT |
| CONVOLUTION | (9) | DWE to CPH |
| CONESTOGA | (8,10,12) | MC to C2 |
| PANDEMONIUM | (6) | AL to TC |
| MIRAGE | (2,4,5,6,7,8) | EIT to PHY |
| MINECRAFT | (2,3,12) | E5 to E3 |
| NUNDINAE | (1,9,10,12) | E2 to DWE |
| ARGO | (1,2,4,5,6,7,8,10) | EV1 to ML |
| BLACKBERRY | (2,3) | TC to SCH |
| NEBULA | (2,3,4,5,7,8) | E3 to E2 |
| REGROUP | (1,4,7,10,11,12) | C2 to DC |
| AVENUE | (3,4,7,8,9,10) | ML to AL |
| HEMLOCK | (7,9,10,11,12) | AL to EV1 |
There are a few things to notice. First, the number of numbers added to the length of the answer is always 12. And, in each list of numbers, at most one of each number from 1 to 12 appears. The buildings form three separate chains:
- B2 to QNC to MC to C2 to DC to EIT to PHY
- E5 to E3 to E2 to DWE to CPH
- AL to EV1 to ML to AL to TC to SCH
These lengths precisely match the lengths of the three paths in the puzzle. So, placing spaces where the numbers tell us to, we can write in the answers between their corresponding buildings as follows:
Now, recall that every edge in Deja vu two had 12 dashes. So, we can take our three paths from this puzzle, and put them back into Deja vu two, matching up the buildings. The first path traces out an M, the second a C, and the third a picture of a key. Writing in the circled characters looks like this:
Reading off these characters left-to-right, top-to-bottom gives the message TOP-NE-CORNER-RULING-DRAGON, GERUNDO-LAKE. This tells you to go to the top north-east corner of MC.
When you go there (the 7th floor landing at the top of the stairwell, which is a giant ruler), you see a sign that reads "here be dragons!"
You also find two construction pails, but one of them is hiding the box!
The box has two 5-letter combination locks.
The dragon that rules Gerundo Lake is TARANTASIO.
You open the box with this code, and inside is a piece of paper telling you to insert CONCORDIA CUM MEMORIA into the meta answer checker.
This is the end.